


How to Set Up a Drum Kit: Beginner’s Step-by-Step Guide
- Posted on
- By Alex
- 0
A simple step-by-step guide to setting up an acoustic drum kit comfortably, covering the throne, pedals, snare, toms, hi-hats and cymbals.
Setting up a drum kit is much easier when you work through each part in a clear order. This guide uses a standard right-handed five-piece acoustic kit and focuses on creating a setup that feels comfortable, stable and easy to play.
Every drummer's setup is slightly different. Use these steps as a guide, then adjust the kit to suit your height, reach and playing style.
New to drums? Start with our Acoustic vs Electronic Drums for Beginners Guide or our Ultimate Beginner Acoustic Drum Kit Buyer's Guide.
Before You Start
- Choose enough space. Allow room for the drums, cymbal stands and your seated playing position, not just the size of the drum mat.
- Make sure the drumheads are already fitted. This guide starts once the heads, hoops and tension rods are installed on each drum.
If your drumheads still need fitting or tuning, follow our How to Tune a Drum Kit: Step-by-Step Guide first, then return here once the drums are ready to position.
Quick Answer: How to Set Up a Drum Kit
- Step 1: Put down your drum mat.
- Step 2: Place the bass drum towards the front of the mat.
- Step 3: Position and adjust your drum throne.
- Step 4: Attach the bass drum pedal and fine-tune your position.
- Step 5: Position the hi-hat stand under your left foot.
- Step 6: Place the snare drum comfortably between your legs.
- Step 7: Position the rack tom or toms within easy reach.
- Step 8: Position the floor tom beside you.
- Step 9: Add your crash, ride and other cymbals.
- Step 10: Check the complete setup for comfort, reach and stability.
What Do You Need to Set Up a Drum Kit?
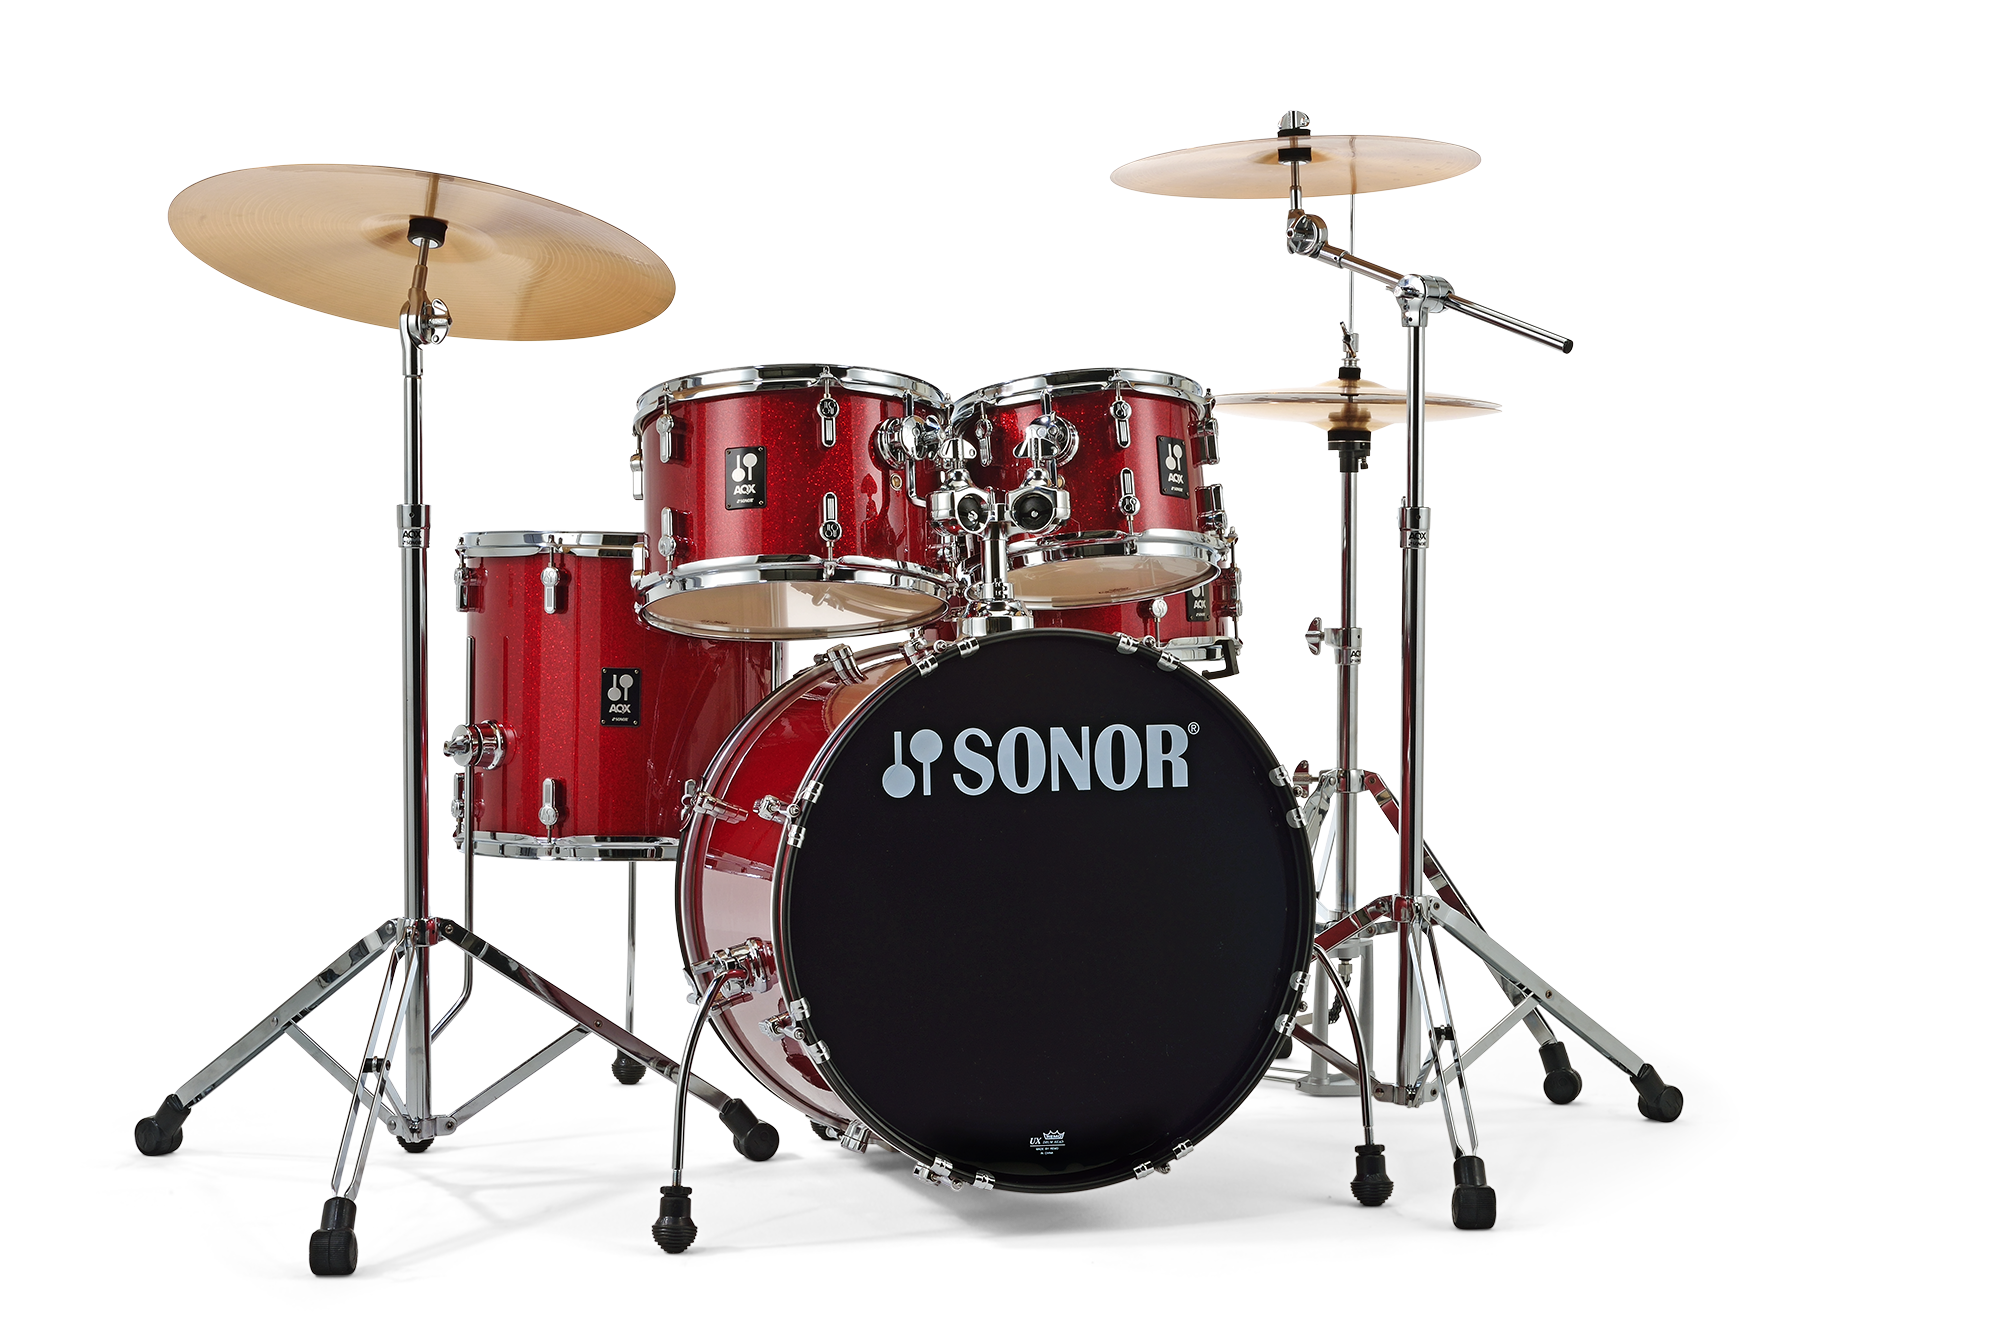
For a typical five-piece acoustic drum kit, you will usually need:
- Bass drum
- Snare drum
- One or two rack toms
- Floor tom
- Drum throne
- Bass drum pedal
- Hi-hat stand
- Snare stand and cymbal stands
- Hi-hats, crash and ride cymbals
- Drumsticks
- Drum key
- Drum mat or suitable non-slip rug
Exactly what comes with your kit will vary. Some complete beginner packages include the drums, hardware and cymbals, while a shell pack may only include the drums and essential tom-mounting hardware.
If you are unsure which stands and hardware you need, our Beginner's Guide to Choosing Drum Hardware explains each of the main components.
It is also worth keeping a drum key nearby while you set up. You will need one for tuning, and it can also adjust any hardware on your kit that uses a standard drum-key bolt. A simple option is the Tama TDK10 Drum Key.
Put Down Your Drum Mat
Start by laying down your drum mat or suitable non-slip rug. This helps stop the bass drum, pedals and stands from gradually moving across the floor while you play and also protects the flooring underneath.
Position the mat where you want the main body of the kit to sit. Leave enough room around it for cymbal stands and enough space behind the kit for your seated playing position.
Choosing a Drum Mat
For a standard five-piece kit, a mat around 1.8m x 1.6m is a useful guide. The exact size you need will depend on the kit and how widely you position your stands.
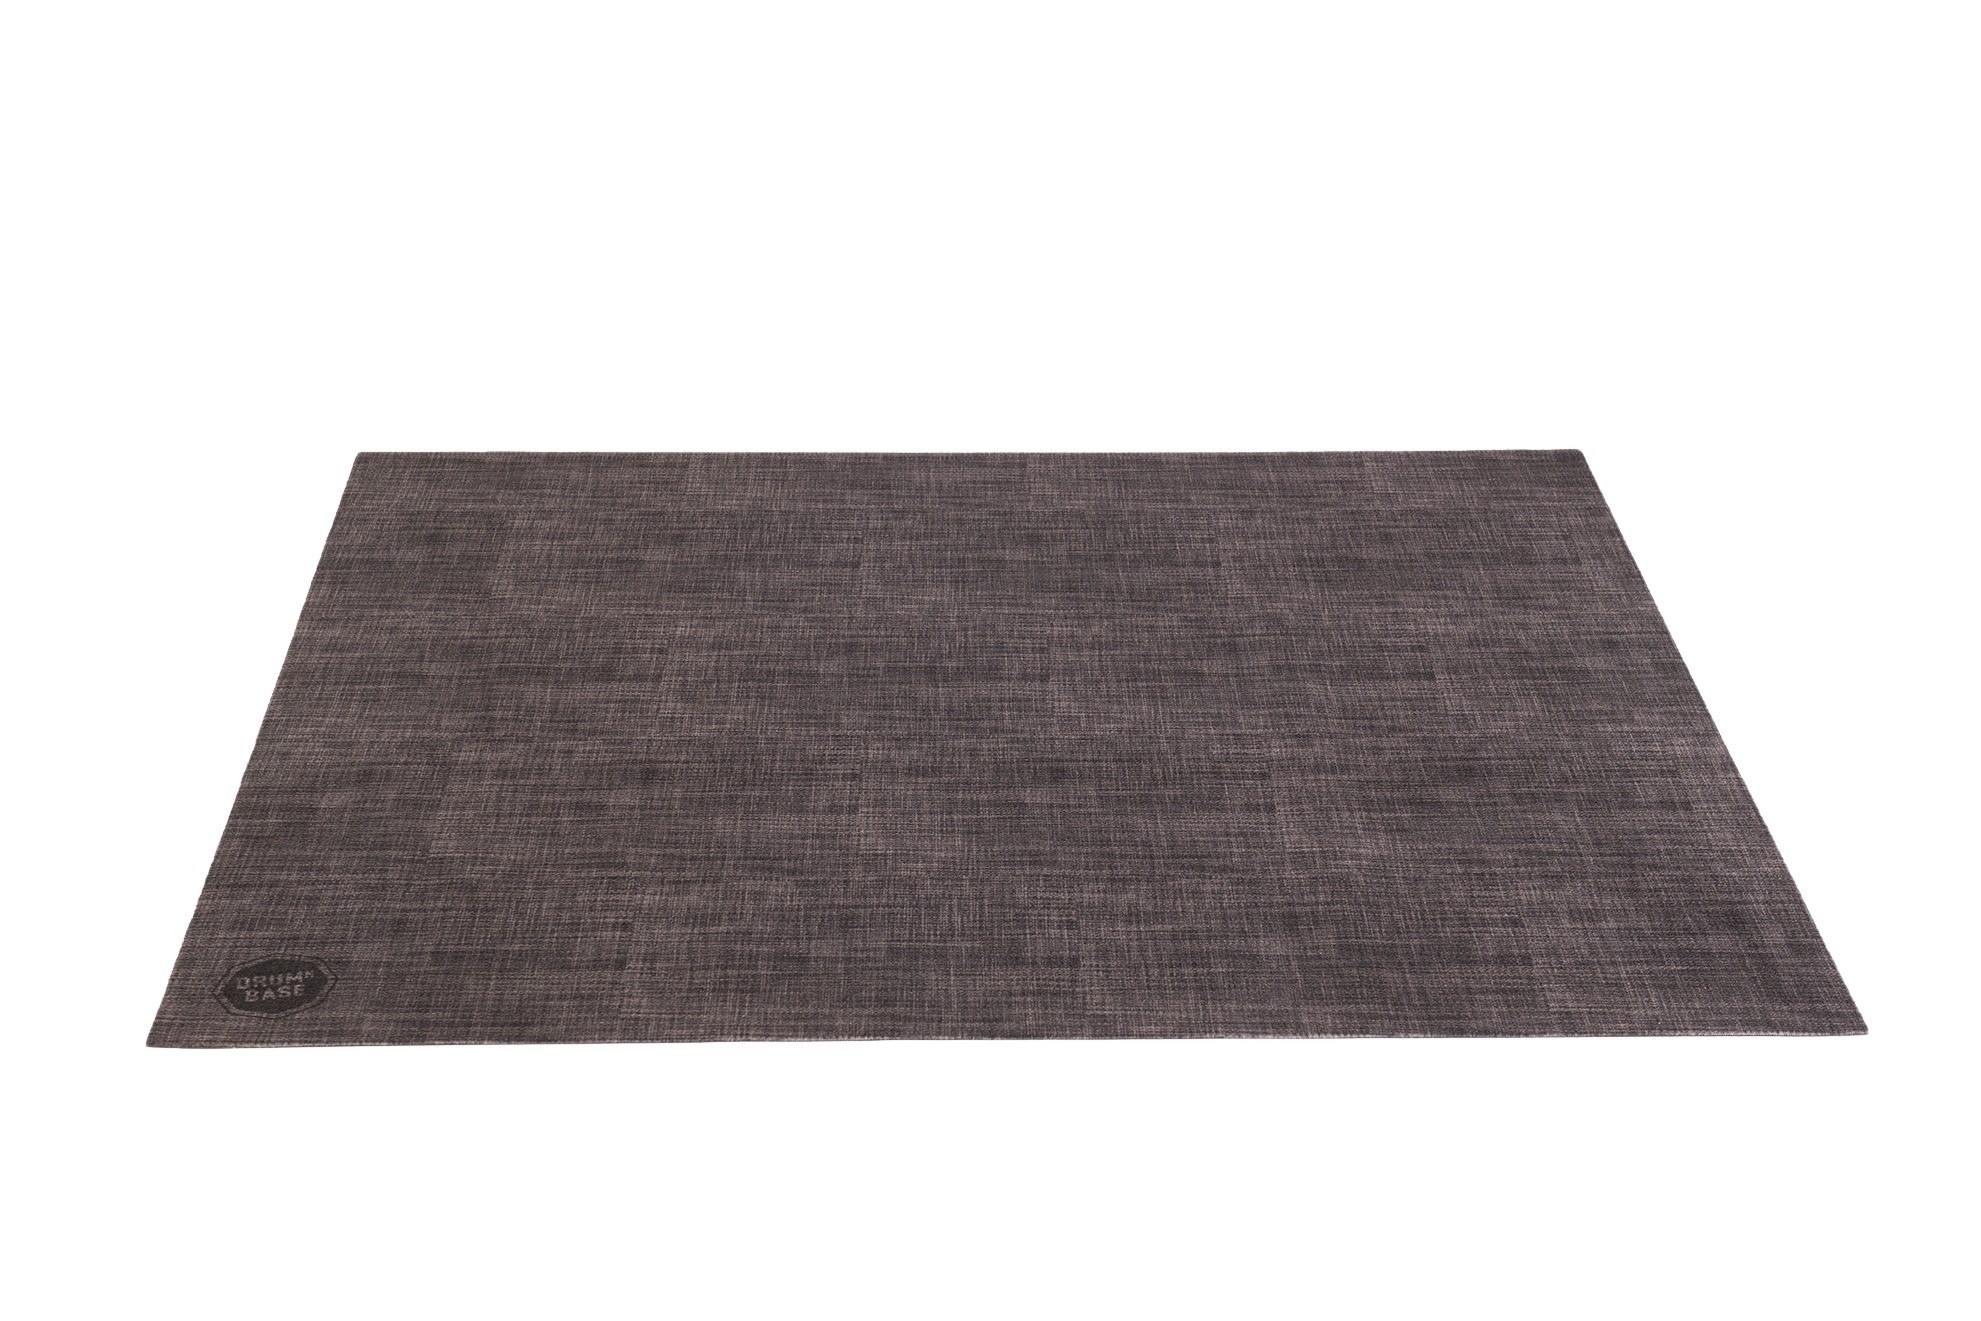
You can also browse our full range of drum mats to compare different sizes and styles.
Position the Bass Drum
The bass drum is a useful first reference point because it establishes the main footprint of the kit. Place it towards the front of the drum mat, leaving enough space behind it for the throne, pedals and snare drum.
Don't worry about getting the exact distance or angle perfect yet. You will fine-tune the bass drum once you are seated and the pedal is attached.
Set the Bass Drum Spurs
Extend the bass drum legs or spurs so the drum sits securely and cannot roll or slide forwards during normal playing.
If the spurs have retractable metal spikes, only use them on a suitable drum mat or carpet where they will not damage the floor underneath.
Position and Adjust Your Drum Throne
Place your drum throne behind the bass drum and sit down. From this point onwards, use your body and natural playing position to decide where the rest of the kit should go.
How High Should a Drum Throne Be?
A useful beginner position is to sit with your thighs roughly level or sloping slightly downwards towards your knees.
Your back should feel relaxed and your feet should be free to move. Avoid sitting extremely low, particularly if this causes your knees to sit noticeably higher than your hips.
How Far Should You Sit From the Bass Drum?
Sit close enough that your right foot can rest naturally where the bass drum pedal will sit, but not so close that your leg feels cramped. You should not need to stretch your leg forwards to reach the pedal.
For more on seat height, adjustment systems and different throne shapes, read our Complete Drum Stool Buyer's Guide.
Attach the Bass Drum Pedal
The bass drum pedal attaches to the batter-side hoop of the bass drum using its clamp. Position the pedal so it sits squarely against the hoop and lines up naturally with your right foot.
Before tightening the clamp, check the area where it will contact the hoop.
Protect the Bass Drum Hoop
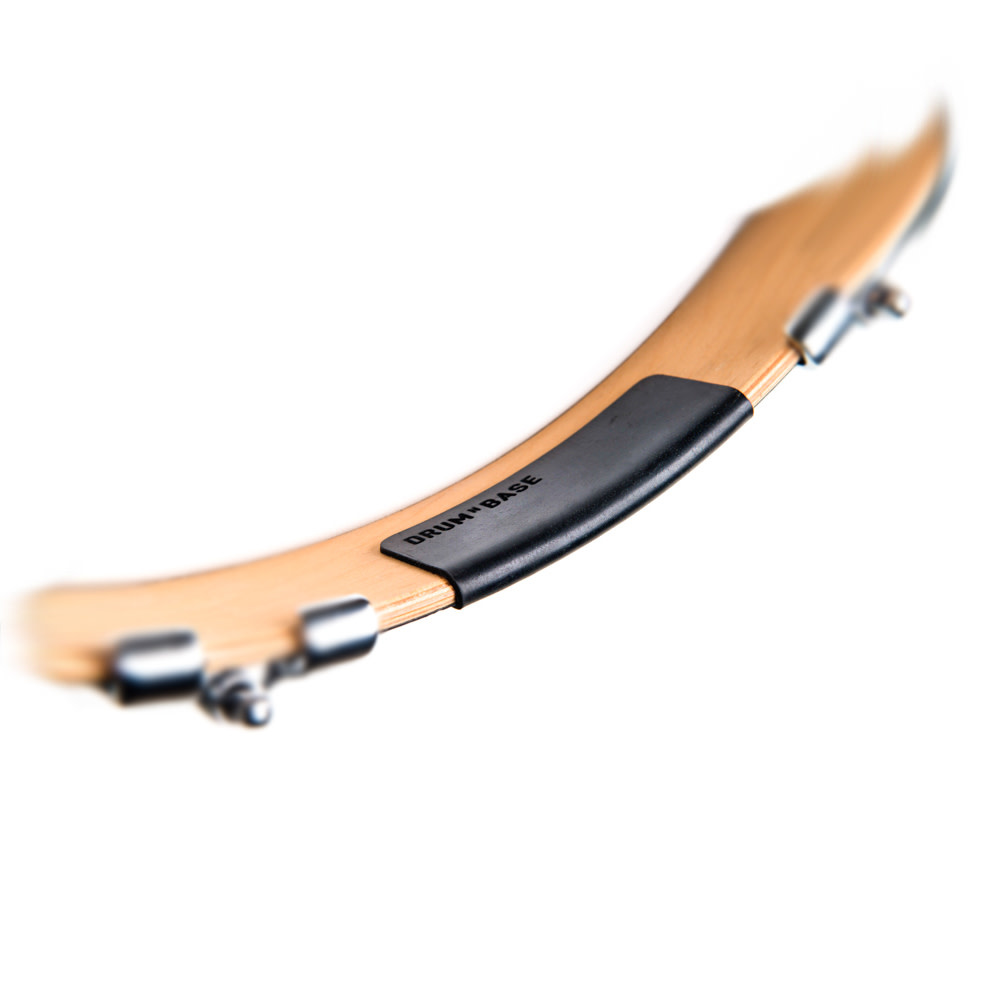
Repeatedly attaching and removing a pedal can leave marks or wear on a wooden bass drum hoop over time. A simple way to help protect this area is to fit a Drum N Base Hoop Protector 180 before clamping the pedal in place. This creates a protective contact point and can also help the pedal grip securely.
Secure and Position the Bass Drum Pedal
With the hoop protected if required, tighten the pedal clamp until the pedal sits flat and feels secure. Avoid applying unnecessary force to the clamp.
Place your right foot naturally on the pedal. You can now make small adjustments to the bass drum angle, throne position or distance between the two until your hip, knee and ankle feel relaxed.
The bass drum does not need to point perfectly straight ahead. A slight angle is completely normal if it follows the natural direction of your leg.
Where Should the Bass Drum Beater Hit?
As a simple starting point, aim for the beater to strike somewhere around the central area of the bass drum head. Check that the beater makes clean contact and that the pedal moves freely.
Most beginners can leave the pedal close to its standard settings initially. Spring tension, beater angle and other adjustments can be explored later as your technique develops.
Our Beginner's Guide to Choosing a Bass Drum Pedal explains pedal types, features and adjustments in more detail.
Position the Hi-Hat Stand
With your right foot resting comfortably on the bass drum pedal, allow your left foot to fall naturally and position the hi-hat pedal underneath it.
The bass drum and hi-hat pedals should create a comfortable, open stance. They do not need to look perfectly symmetrical, and you should not force the hi-hat inwards if this makes your leg position feel cramped.
How High Should Hi-Hat Cymbals Be?
Position the hi-hats high enough that your hands can move comfortably between the snare and cymbals without constantly colliding, but low enough that you can reach them without lifting your shoulder.
Fit the bottom cymbal onto the hi-hat seat and attach the top cymbal using the clutch. Leave a small gap between the cymbals when your foot is off the pedal, then press the pedal several times to check that the stand opens and closes smoothly.
Position the Snare Drum
Open the snare stand basket and place the snare securely inside it. Tighten the basket enough to support the drum without clamping it excessively.
Position the snare comfortably between your legs. It should be close enough that you can strike the centre of the head without reaching forwards while still leaving both legs free to operate the pedals.
How High Should a Snare Drum Be?
A useful starting point is to position the top of the snare somewhere around lap or waist height when seated. You should be able to strike both the centre of the head and the rim without lifting your shoulders or bending your wrists awkwardly.
Should a Snare Drum Be Flat or Angled?
Both are common. The snare can sit flat or be slightly angled towards you. For a beginner, avoid an extreme tilt and focus on finding a position that allows comfortable access to both the centre of the drum and the rim.
Position the Rack Tom or Toms
Mount your rack tom or toms in front of you and bring them close enough to reach comfortably from the snare drum.
Depending on the kit, the toms may mount directly from the bass drum, from a separate tom stand or from clamps attached to other hardware.
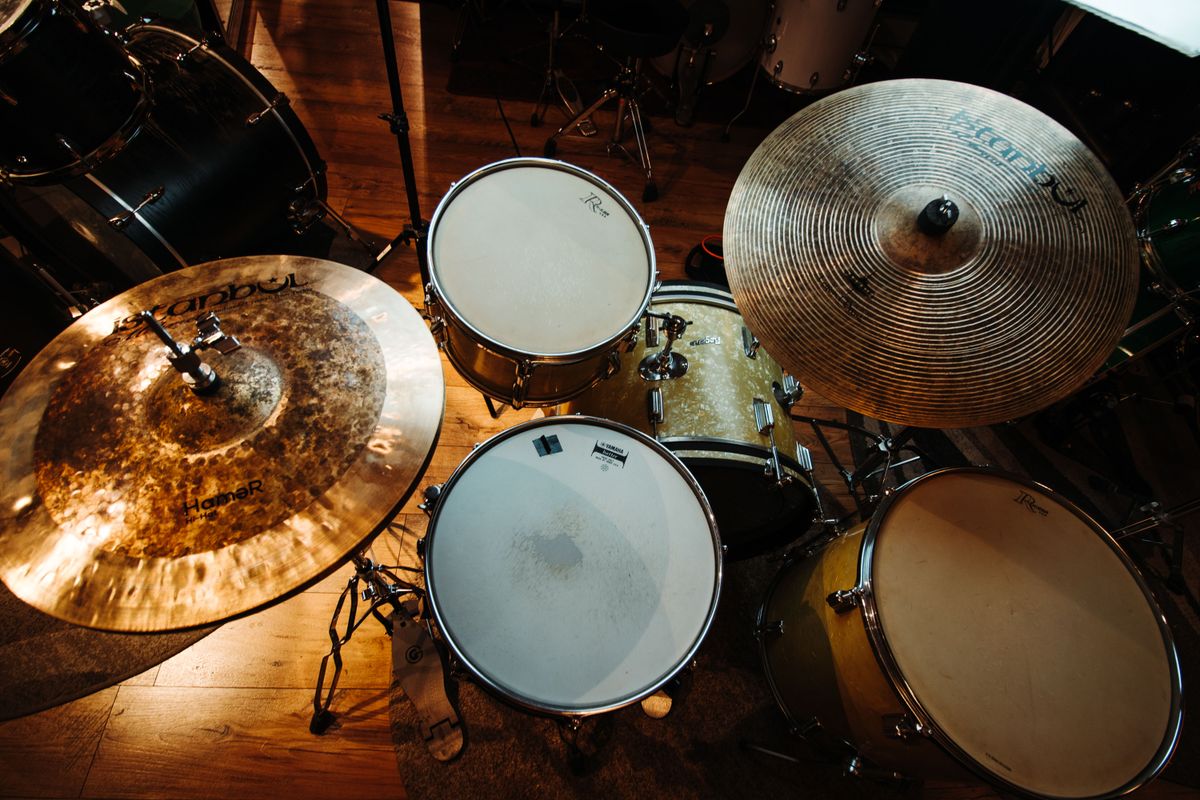
What Angle Should Rack Toms Be?
A small angle towards the player usually works well. The aim is to strike the drumhead naturally without reaching upwards or repeatedly catching the rim.
One of the most common beginner setup mistakes is positioning rack toms at very steep angles. Where possible, bring the drums closer and use a shallower angle instead. This usually makes movement between the snare and toms smoother.
The size of your bass drum and rack toms will affect how low the toms can physically sit. A kit with a larger bass drum may naturally require the rack toms to sit slightly higher.
Position the Floor Tom
On a standard right-handed setup, the floor tom normally sits to the right of the player. Bring it close enough that you can move naturally from the rack toms to the floor tom without leaning or twisting excessively.
How High Should a Floor Tom Be?
Start with the floor tom at roughly a similar height to the snare, then adjust it to suit your height and the size of the drum.
Should a Floor Tom Be Flat or Angled?
Many drummers position the floor tom almost flat, while others prefer a slight angle towards them. Adjust the three legs until the drum feels stable and you can comfortably strike the centre of the head.
Set Up Your Crash and Ride Cymbals
Once the drums are comfortably positioned, build the cymbals around them. On a typical right-handed setup, the crash cymbal is usually positioned towards the front-left of the kit, while the ride cymbal normally sits on the right.
These are only starting positions. The important thing is that each cymbal can be reached comfortably without stretching or lifting your shoulders unnecessarily.
How High Should Cymbals Be?
Keep your cymbals within easy reach while allowing enough clearance above the drums. Beginners often position cymbals much higher than necessary, which can make playing more tiring.
What Angle Should Cymbals Be?
A slight downward angle towards the player encourages a more natural glancing contact with the cymbal rather than repeatedly striking directly into its edge.
Keep Cymbal Stands Stable
Open each stand's tripod legs fully and make sure the stand is balanced before fitting the cymbal.
With a boom stand, avoid extending the boom further than necessary. The further the cymbal moves from the centre of the stand, the more load is placed on the base.
Where possible, point one tripod leg in the same direction as the boom arm and cymbal so the weight is supported more directly over a leg.
Don't Overtighten Your Cymbals
Never place a cymbal directly onto an exposed metal post. Make sure the correct plastic cymbal sleeve and felts are fitted where required.
Tighten the wingnuts only enough to keep everything secure. The cymbal should still be able to move naturally when struck.
If hi-hats, crashes and rides are still unfamiliar, our Ultimate Beginner's Cymbal Guide explains the main cymbal types, sizes and sounds.
Check and Fine-Tune the Full Setup
Once every drum and cymbal is in position, sit down and play around the entire kit. Do not judge the setup purely by how it looks. Pay attention to how easily your hands, feet and body can move between each part.
- Can you reach every drum and cymbal without leaning or stretching?
- Are your shoulders relaxed and both feet sitting naturally on the pedals?
- Can your legs move freely and can you move smoothly between the snare and toms?
- Are the drums and stands stable, with no tripod legs or pedals getting in the way?
- Are all clamps and wingnuts secure without being excessively tight?
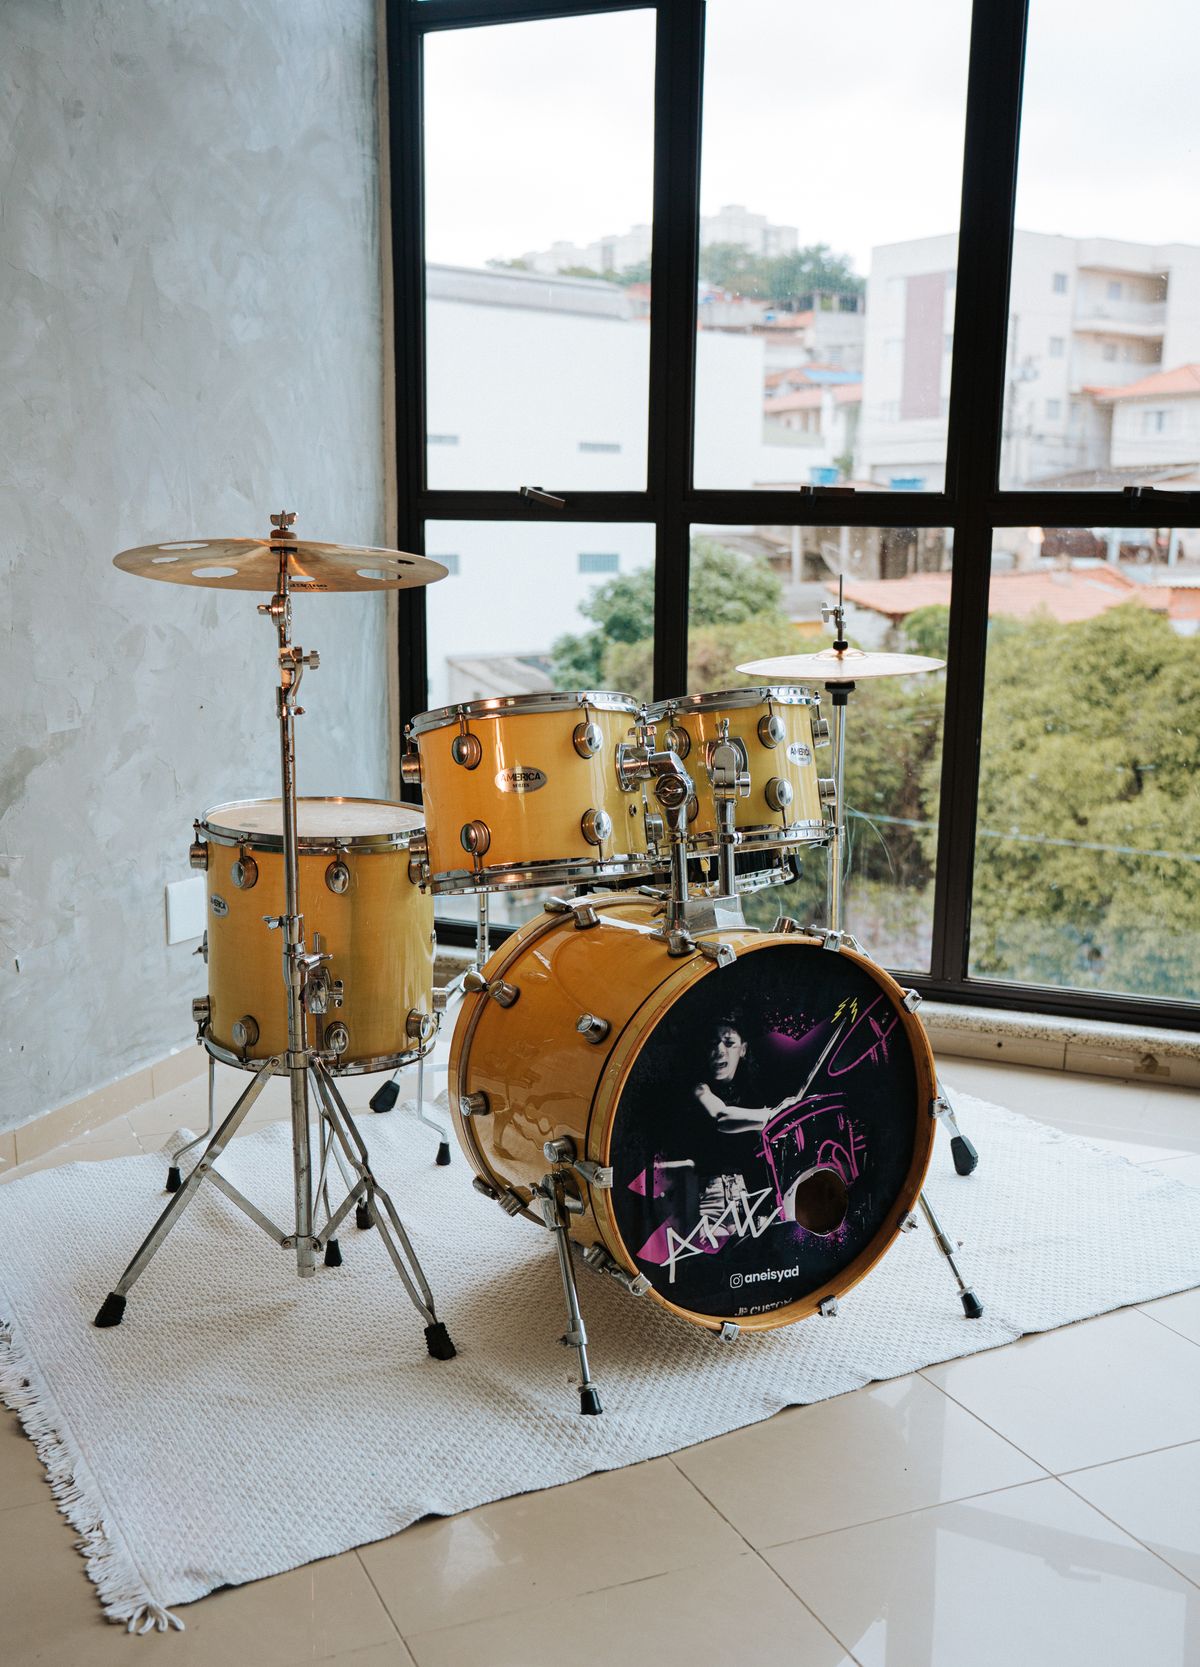
Once You're Happy, Mark Your Drum Kit Positions
Once the kit feels comfortable, take a quick photo so you have a visual reference if you need to rebuild it later.
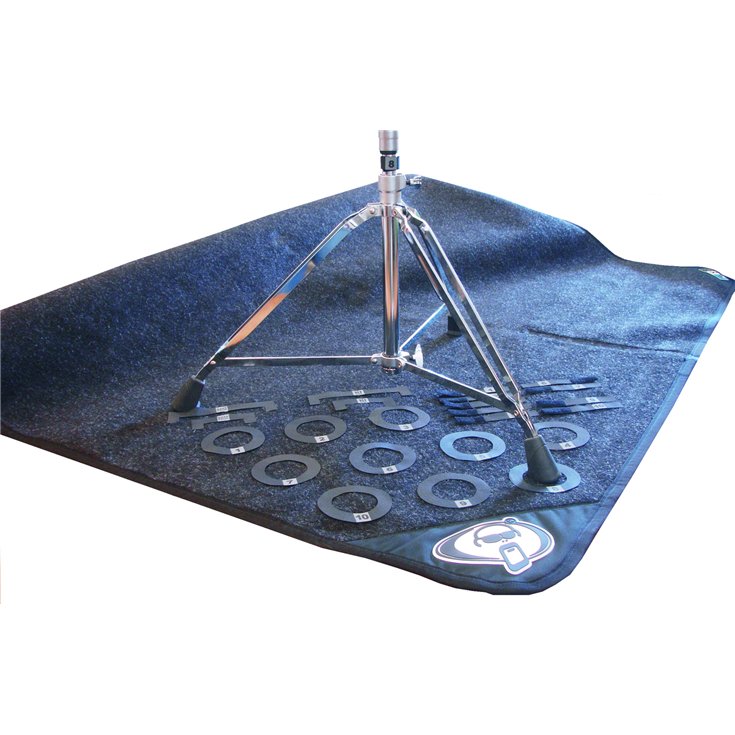
For an even quicker setup, mark the positions of your stands and pedals on the drum mat. This is especially useful for rehearsals and gigs.
If your tom arms or stands have memory locks, set them once the final heights and positions are established. They help hardware return to the same position after the kit has been packed away.
Protection Racket Drum Mat Markers provide clear reference points for your hardware, making it easier to return stands and pedals to the same positions each time you rebuild the kit.
Common Drum Kit Setup Mistakes
Most beginner setup problems can be fixed with a few simple adjustments.
Sitting Too Low
A very low throne can restrict leg movement and make the pedals harder to operate comfortably. If your knees sit noticeably above your hips, try raising the throne slightly and reassessing the setup.
Setting the Rack Toms at Extreme Angles
Very steep tom angles can make clean strokes more difficult. Bring the toms closer and flatten the angle where the kit allows.
Putting Cymbals Too High or Too Far Away
You should not need to fully extend your arms or raise your shoulders significantly to reach a crash or ride. Bring the stand or boom arm towards you instead.
Leaving Too Much Space Between the Drums
A reasonably compact setup generally makes moving around the kit easier. Leave enough clearance for the drums and hardware, but avoid unnecessary gaps.
Overtightening Hardware
Drum hardware should be secure, but excessive force is rarely necessary. Tighten clamps and wingnuts enough to hold everything safely in position without forcing them.
How Do You Set Up a Drum Kit for a Left-Handed Player?
A conventional left-handed drum kit setup is essentially a mirror image of the right-handed layout described above. The bass drum is played with the left foot, the hi-hat moves to the right and the floor tom usually moves to the left.
However, there is no rule that every left-handed drummer needs to reverse the entire kit. Some players use conventional or open-handed layouts instead. Whichever approach you choose, the same principles apply: keep everything stable, comfortable and within easy reach.
Drum Kit Setup for Children and Smaller Players
For children and smaller players, set the throne height first so they can sit comfortably with both feet resting naturally on the pedals.
Then bring the snare, toms and cymbals as close and as low as the hardware allows, without forcing awkward angles. The player should be able to reach the kit without stretching or raising their shoulders.
If the rack toms still sit too high because of a large bass drum, a kit with a smaller 18" or 20" bass drum and shallower toms can be much easier to position.
What to Do After Setting Up Your Drum Kit
Once the kit is comfortable, stable and within easy reach, there are a few useful next steps before you settle into regular playing:
- Tune the drums. Our How to Tune a Drum Kit guide covers the toms, snare and bass drum step by step.
- Choose suitable drumsticks. Our How to Choose Drum Sticks: The Ultimate Buyer's Guide explains common sizes, tips and materials.
- Protect your hearing. Acoustic drums and cymbals can produce very high sound levels at close range, so our Drummer's Guide to Hearing Protection is an important next read before regular practice.
Final Thoughts
A good drum kit setup should let you reach the drums, cymbals and pedals comfortably without unnecessary stretching, twisting or extreme angles. Build the playing position around your body, then bring the rest of the kit towards you.
Once everything feels comfortable and stable, play the full kit and make small adjustments where needed. Your setup will naturally develop as your technique and preferences change.
Frequently Asked Questions
What is the correct order for setting up a drum kit?
Start with the drum mat and bass drum, then position the throne and bass drum pedal. Add the hi-hat, snare, rack toms, floor tom and finally the cymbals. Finish by playing the full kit and making small adjustments for comfort and reach.
Does the drum throne need to sit on the drum mat?
No. The main purpose of the drum mat is to prevent the drums, pedals and stands from moving. Depending on the size of the mat and your setup, the throne may sit partly or completely behind it.
How high should I sit at a drum kit?
There is no exact height that suits everyone. A useful starting point is to sit with your thighs roughly level or sloping slightly downwards, with both feet resting naturally on the pedals and enough room for your legs to move freely.
Should a snare drum be flat or angled?
Either can work. A flat snare or a slight angle towards the player are both common. Avoid extreme angles and choose a position that gives comfortable access to both the centre of the drum and the rim.
What angle should rack toms be?
A slight angle towards the player is a good starting point. Avoid very steep angles and position the toms so that you can strike the heads comfortably without reaching or repeatedly catching the rims.
How high should cymbals be?
Cymbals should be high enough to clear the drums but low enough that you can reach them without significantly raising your shoulders or fully extending your arms.
Can children use a full-size drum kit?
Often, yes. Set the throne so the player can sit comfortably with both feet on the pedals, then bring the drums and cymbals closer and lower where possible. If a large bass drum prevents the rack toms from sitting low enough, smaller drum sizes may be more comfortable.
Do I need a drum mat?
A drum mat is strongly recommended. It helps stop the bass drum, pedals and stands from moving while you play and can also protect the floor underneath the kit.
How can I set my drum kit up in the same position every time?
Once you are happy with the setup, take a photo and mark the positions of your pedals and stand feet on the drum mat. Purpose-made drum mat markers can make these positions easy to identify when rebuilding the kit.












Comments
Be the first to comment...